Blogging has brought an unexpected opportunity. Out of the blue, I was invited, along with a number of other bloggers, to participate in a cross-Canada photography contest using Fujifilm digital cameras. I was sent a Fujifilm FinePix S1800 to play with, and I’ve been happily shooting away, looking especially hard for beauty in a season when we tend to focus our attention indoors, chasing sunrises, carrying a tripod around and exploring the features of this fun camera.
The S1800 is a consumer-level camera, currently selling for under $200. It makes me look like a serious photographer as I walk around town, but it isn’t actually a D-SLR. Its range of features are a result of how computer technology has advanced. It certainly provides a lot of bang for the buck.
St. John's Church, Lunenburg, with Lunenburg Bay visible in the distance. I like the contrast between the straight lines of the church's exterior decor and the curves of the branches.Pizza night in Lunenburg. Even lobsters like pizza.
This is a huge range for a zoom lens. It makes for a very versatile camera, especially given the camera’s handy size, which is bulkier than your average point-and-shoot, but nothing like a professional kit with interchangeable lenses and heavy telephotos. At under $200, this is not a professional camera, however; it is clearly pitched at the consumer market as a step up from a typical point-and-shoot. So here’s what you can expect from the lens.
A huge range from wide angle to telephoto
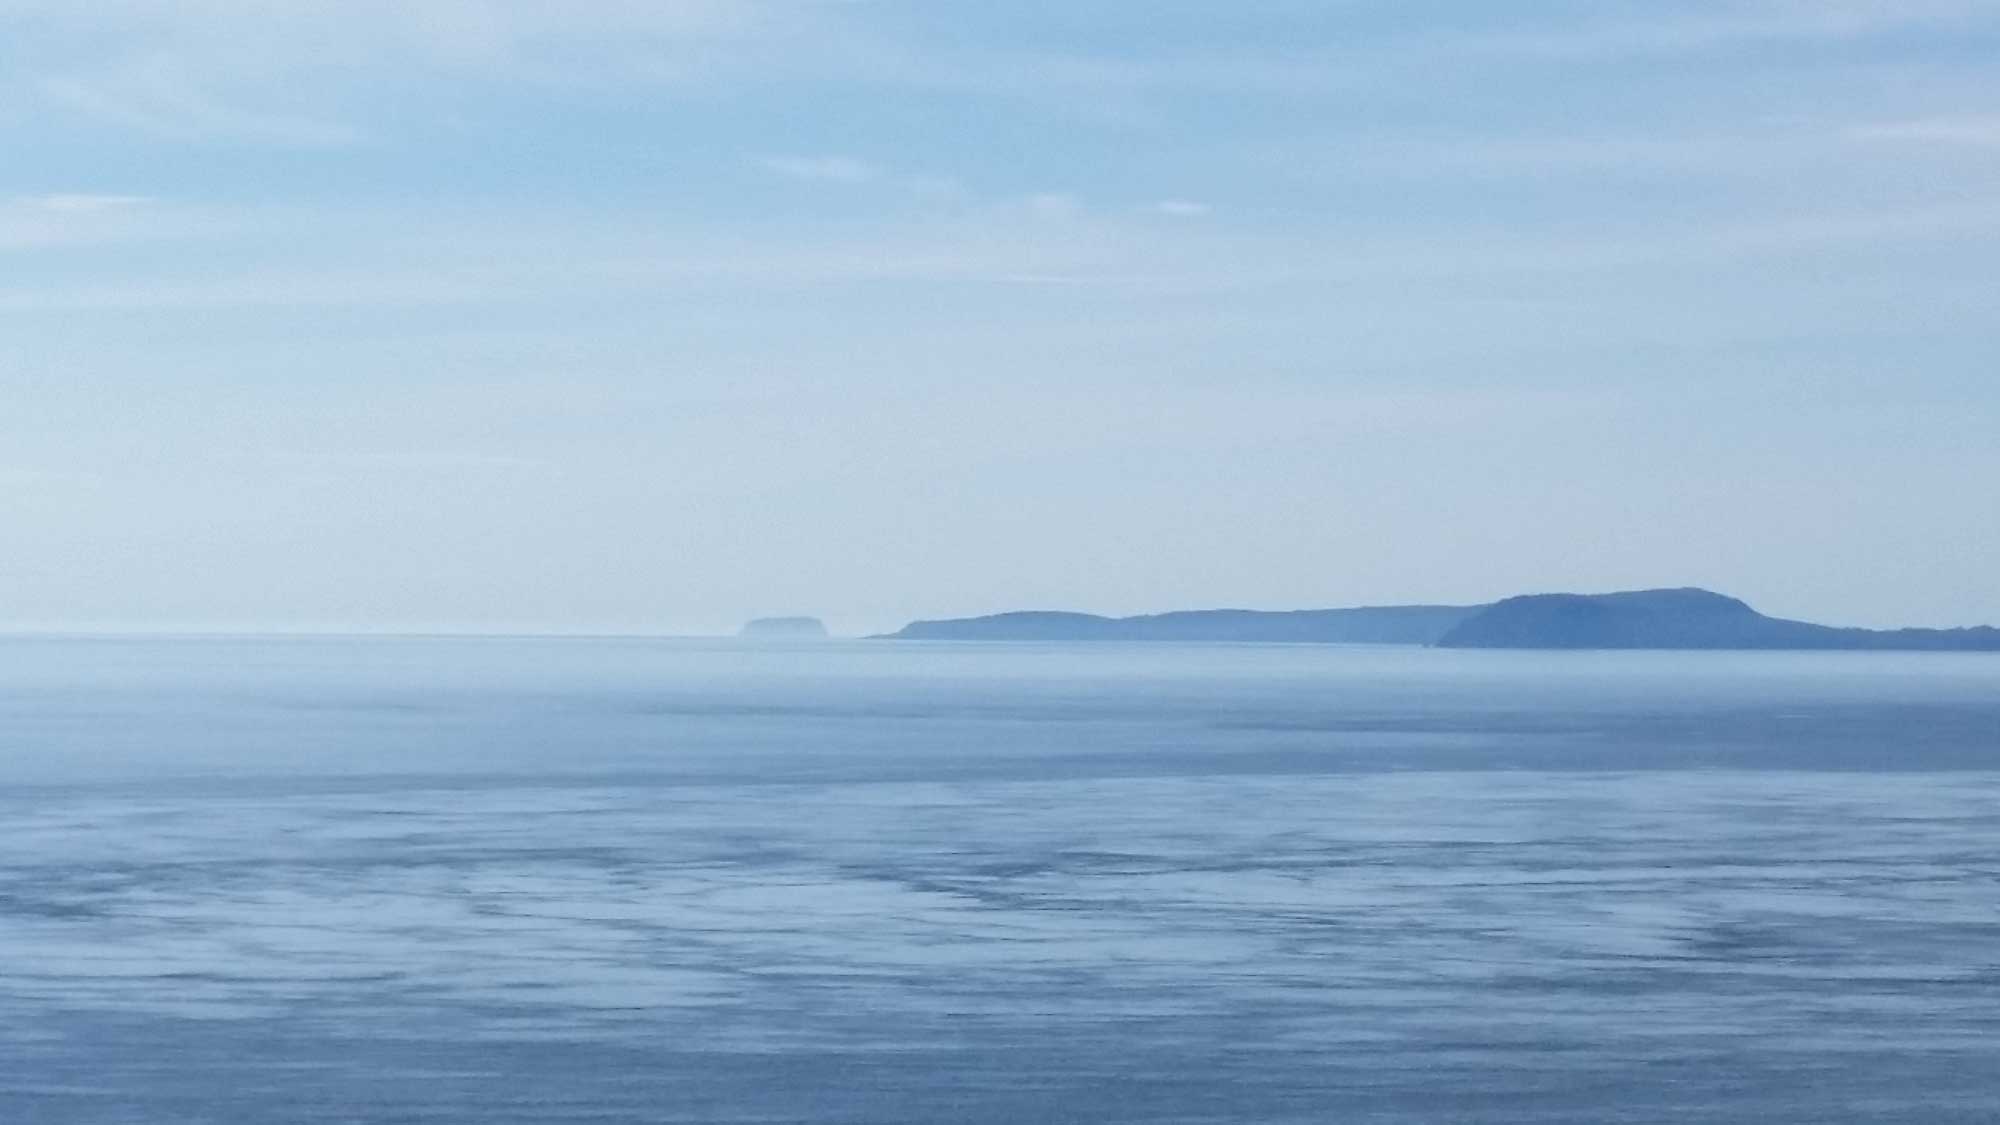
Taken at the S1800's widest angle, 28 mm equivalent.From the same spot, zoomed in all the way with the 18x optical zoom. You can see the masts of the sailboats stored on the hill at South Shore Marine, 5.5 km away.
There is no way that my old 35mm SLR could have taken a photo in focus like the one directly above without being mounted on a secure tripod and using the shutter timer so that my hand wouldn’t jostle the camera as I took the picture.
But I took the photo above without a tripod, and achieved this level of focus thanks to the camera’s “dual image stabilization”.
And in between the wide angle and the telephoto are a wide range of possibilities. A zoom is extremely handy for framing photos on the fly. You can zero in on your subject matter and exclude extraneous items, or you can shoot at wide angle, placing your subject in context, if it is close enough to the camera. Your choice, every time. I really enjoy zoom lenses.
Here is a photo made possible by the zoom. I wanted a picture of a boat sitting on the wharf for the winter in the foreground with Mahone Bay’s famous Three Churches behind it. But I wanted the distant churches to appear big enough so that it wasn’t just about the boat. Solution: back away from the boat so that it appeared smaller, and then zoom in and frame the image. The name of the boat was a bonus.
Mahone Bay's Three Churches juxtaposed with a fishing boat spending its winter on the town wharf
There are things you can do with a DSLR that you can’t do with a camera like this. But at under $200, it gives most of us more possibilities than we will ever use.
Fujifilm FinePix S1800 12.2 MP Digital Camera with 18x Wide Angle Optical Dual Image Stabilized Zoom and 3-Inch LCD
One of the Fujifilm FinePix S1800‘s most impressive features is the ability to knit together two or three shots to make a panorama – right in the camera! The panorama feature is part of what makes this camera – which you can get for under $200 – a lot of fun for the money.
As you’d know if you’ve looked through this website, I love making panoramas. They help to capture the wide open scenery that takes your breath away.
But I’ve been doing it the hard way for years now, photoshopping the pictures together on my computer. Meanwhile, technology has marched on, and a camera can now make a panorama right on the spot!
In this article I want to share my experience with taking panoramas with the Fujifilm FinePix S1800 and give some pointers. It’s so easy to use the panorama mode, but I have learned a few things along the way. I hope that sharing them here will help you take better panoramas with the S1800 or other camera with similar features (including several other Fujifilm models).
Right out of the box
I started taking panoramas right away, without reading the manual. The camera taught me.
“How good can it be?” I had to know first. Well, here’s an example:
Panorama of 3 shots created inside the FinePix S1800
Please ignore the photographic faux pas of my shadow cast by the rising sun. The point is, I cannot tell where the frames have been stitched together. Amazing!
Once I picked my jaw off the floor, I began to learn more about the ins and outs of the S1800’s panorama feature.
For example, here’s one that didn’t work out quite as well. The sun was playing hide and seek, and the lighting changed between one shot and the next, particularly in the way it reflected off the waves.
Attempted 3-frame panorama of Lunenburg taken with the FinePix S1800. Note the vertical lines in the water that show the different lighting conditions in each frame as the sun disappeared and emerged from behind the clouds.
The vertical-ish lines in the water show where the frames were joined. (They are not perfectly straight, as is normal with panoramas.)
How to make a panorama with the Fujifilm FinePix S1800
As I have said, the basic procedure is very easy. Select “PANORAMA” mode with the dial on the top of the camera.
To shoot a panorama with the S1800:
Ready to shoot the second frame. On the right you can see a double image: the gable end of the house and the same thing in the left segment of the first frame, already taken. These must be lined up for the panorama stitching to work.
Shoot the first frame – let’s say the one on the right.
The camera asks you to either ‘OK’ the first shot or go back and take it again.
Then it sets you up to shoot the second frame. Stay where you are, but turn to the left a bit. To help you align the second frame with the first and to ensure the proper amount of overlap for the frames to be knit together, the left segment of the first frame you took appears on the right side of the screen. It is partly transparent.
Line up your second shot as best you can under the segment, and press the shutter.
After you ‘OK’ the second frame, the camera sets you up for the third frame in the same way as before.
Once you have shot all three frames, the camera takes several seconds to do its magic – actually a powerful chunk of computing – then presents the result for your approval before storing the image.
The camera is in automatic mode when taking panoramas. It applies the exposure settings from the first picture to the next two, rather than adjusting them for each frame. This is a good thing. Otherwise, as well I know from my experience in Photoshop, the frames may not blend with each other unless you make difficult adjustments to output levels.
Wide angle panorama problems and how to overcome them
The S1800 has a fabulous 18x optical zoom that goes from wide angle, equivalent to a 28 mm SLR lens, to a 500 mm telephoto. How far you are zoomed in or out can affect your panoramas.
Edge distortion
I love a 28 mm wide-angle lens for various reasons, but it naturally has some distortion around the edges. When combining two or three wide-angle frames together into a panorama, these distortions can become compounded.
Taking panoramas of ocean scenery with the Fujifilm S1800 taught me that if you are using the lens at its widest angle, keep the horizon in the middle. If you don’t, then as the camera tries to knit the frames together, it produces results that could make you seasick. The distortion of the wide angle lens, which you might not notice in a single shot, becomes exaggerated as the camera tries to combine the frames into a panorama. Check this out:
Panorama shot at wide angle with horizon near the top. Pass the gravol.
Keep the horizon in the middle and you’ll do much better with your wide angle panoramas:
Western Shore wharf panorama, with horizon in the middle. Ahh, a calm sea.
Distant subject too small
Another possible limitation of wide angle panoramas is illustrated here:
Lunenburg panorama from across the harbour, taken at wide angle. Too much distorted and uninteresting detail in the foreground.
The foreground is taking up way too much space and the compounded lens distortion makes it appear to curve away from the viewer on both sides, while the most interesting part of the picture, the sunlit town across the harbour, has been reduced to a small area. Instead of a wide, interesting view, the scene has been reduced to an inside-out fishbowl.
It would be better to zoom in a bit and make the picture about the town itself – as I attempted to do in the second panorama from the top of this article, in which the sun played tricks on me.
Subject too close to stitch together
There are limits to the correction that the camera can make when you use the wide angle to shoot a subject that is close to you. In the next picture you can see what happened to the filing cabinet which was only six feet away. The camera tried to correct the distortion created by the wide angle, but didn’t entirely succeed.
Indoor experiment in shooting at a wide angle in panorama mode. Too close, too wide-angle.
Zoom in a bit and these problems are gone.
Zooming in somewhat will often give a better result. Lens distortion is gone and a straight line will show up as a straight line in your photo.
One note of warning, however: the further zoomed in you are, the harder it is to line up the frames.
Below is a detail of a panorama showing what can happen.
Part of a panorama showing how I failed to line up the horizon correctly between one frame and the next.
The camera’s image stabilization feature, which is a great help when taking single telephoto pictures, will not help you line up your panorama frames with each other. A good tripod, or very steady hands, breath control and patience are what you need in this situation.
Lots of bang for the buck
I’ve learned a lot while capturing some wonderful panoramic images with the Fujifilm FinePix S1800. Along with the camera’s 28 to 500 mm optical zoom and a number of other features, the panorama setting gives the more advanced amateur photographer new ways to visually explore the world. Thanks to the long zoom and powerful onboard technology, the S1800 is a lot of camera for $200 or less.
Ice in tidal inlet near Oak Island on Mahone BayLunenburg at nightfall. Panoramas taken with a Fujifilm FinePix S1800.
 Blogging has brought an unexpected opportunity. Out of the blue, I was invited, along with a number of other bloggers, to participate in a cross-Canada photography contest using Fujifilm digital cameras. I was sent a Fujifilm FinePix S1800 to play with, and I’ve been happily shooting away, looking especially hard for beauty in a season when we tend to focus our attention indoors, chasing sunrises, carrying a tripod around and exploring the features of this fun camera.


